No Disks to Claim for vSAN?
Every so often, I will see someone hitting a speed bump setting up a disk group for vSAN. The case is the same when setting up for build your own vSAN using the disk claim wizard or VMware Cloud Foundation bring up. I thought I would do a quick write up to set it straight and point out some things to watch out for and different ways to overcome this.
In order to claim a disk group for vSAN, the entire disk must be dedicated for vSAN and no existing partition or data exists. If one or more partition exists, the vSAN disk claim wizard will not recognize a disk as eligible to participate in a vSAN disk group for cache nor capacity tier.
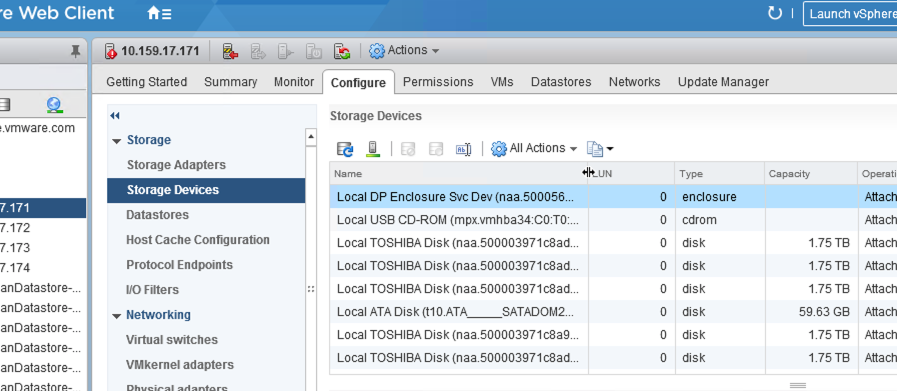
This of course assumes that the disk is already physically connected and recognized by ESXi as a valid storage device. You can validate that the disks have been correctly recognized from the vSphere Client under the host, Configure -> Storage Devices
Possible reasons an existing partition exists:
- Previously used for an operating system installation such as ESXi, Windows, Linux etc
- Previously used for vSAN for another cluster or the same cluster but vSAN had been rebuilt.
- Already claimed and in use by vSAN for another disk group on the existing cluster.
Proceed with extreme caution!
Before removing any partition, proceed with extreme caution as to not remove partitions from an incorrect disk such as the ESXi boot partition itself or another disk in use.
Methods to remove partition
While there are plenty of guides out there that shows you how to remove these partitions, I am simply going to list down the various methods in order of ease and my personal preference.
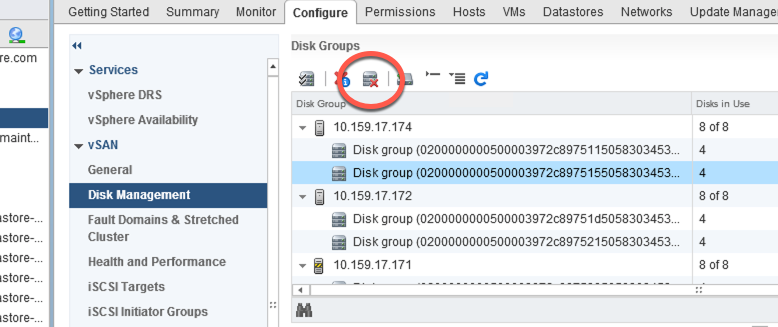
- First and foremost, if you are intending to rebuild a vSAN cluster and the setup is still intact, gracefully unclaim the vSAN disk group from the UI. This will properly remove existing vSAN partitions and free up the disk ready for other use.
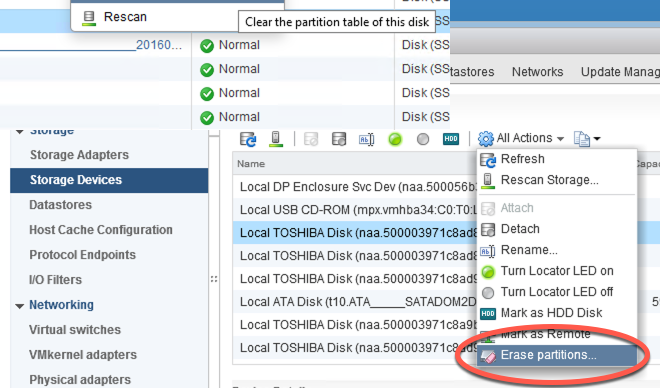
- If the host the disk is connected to is managed by vCenter, you can simply use vCenter UI to select the disk in question and ‘Erase partitions’ from the ‘All Actions’ menu.
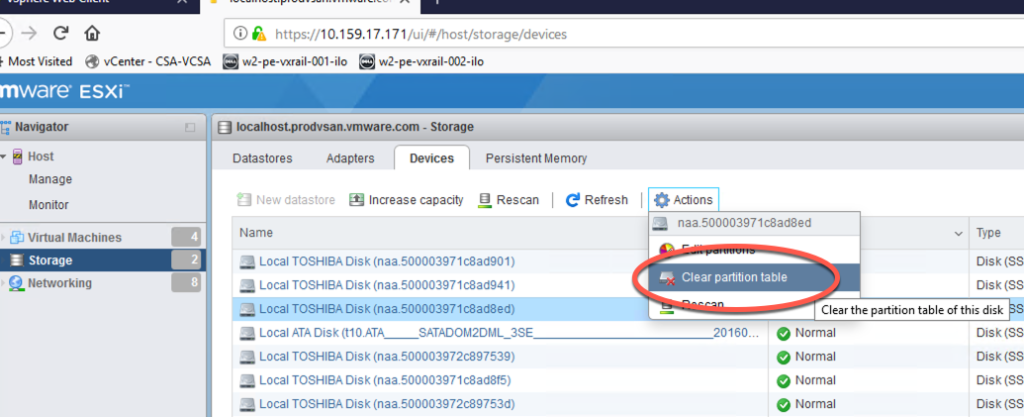
- If the host is not connected to vCenter, the same can be achieved by accessing the host UI and from the ‘Actions’ -> ‘Clear partition table’ menu.
-
Another UI method is to boot off an ISO that has a built in partition utility such as gparted live or even Windows.
-
If you feel the urge to use CLI, the first method is to use fdisk from the ESXi CLI through SSH or DCUI shell.
-
Another CLI option is to use partedUtil as layed out in this KB. https://kb.vmware.com/s/article/1036609
There is this one partition that just would not go away!
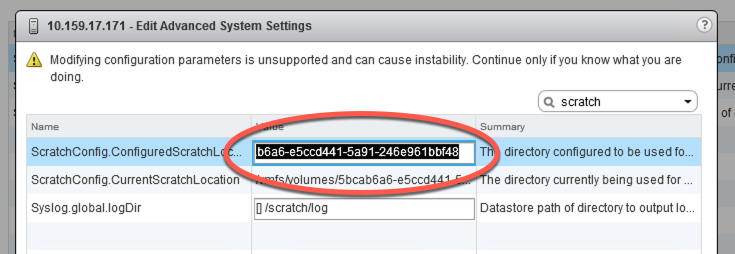
There are occasions when a partition may be used by ESXi to store the scratch partition on a persistent disk. This is most common when you have a previous ESXi installation on the disk that was left behind and you have just reinstalled ESXi on a different disk or SD / USB card. By default, ESXi would have found a VMFS partition it could use and claim that partition for scratch use as appropriate to reduce disk wear on the SD / USB device you are booting off.
In a scenario like this, you would first need to change the target location of the ESXi scratch partition somewhere else (reboot required to take effect) before the partition removal can be successful.
Scratch partition reconfiguration – https://kb.vmware.com/s/article/1033696
Hope this little article would help someone out there.